How to make Cafe-style Tigernut Froyo (Easy Recipe)

SEPRA USA LLC

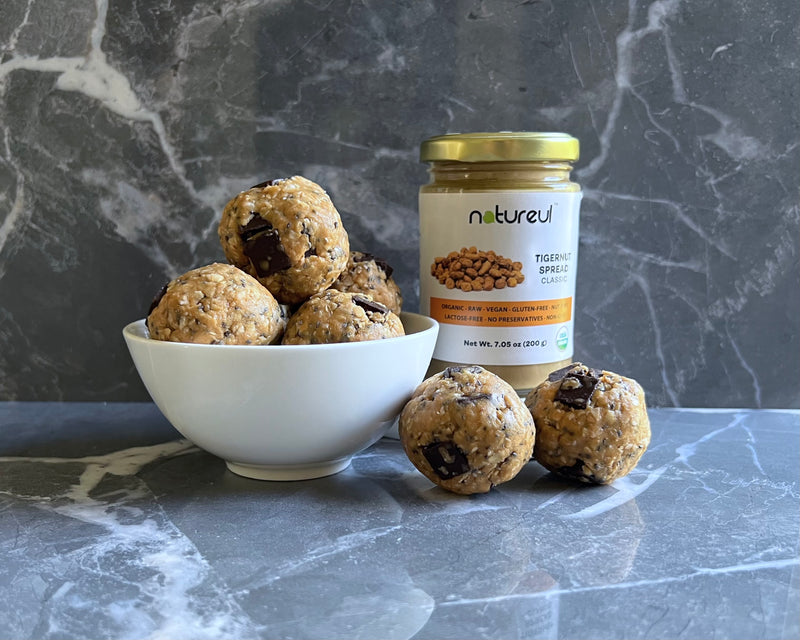
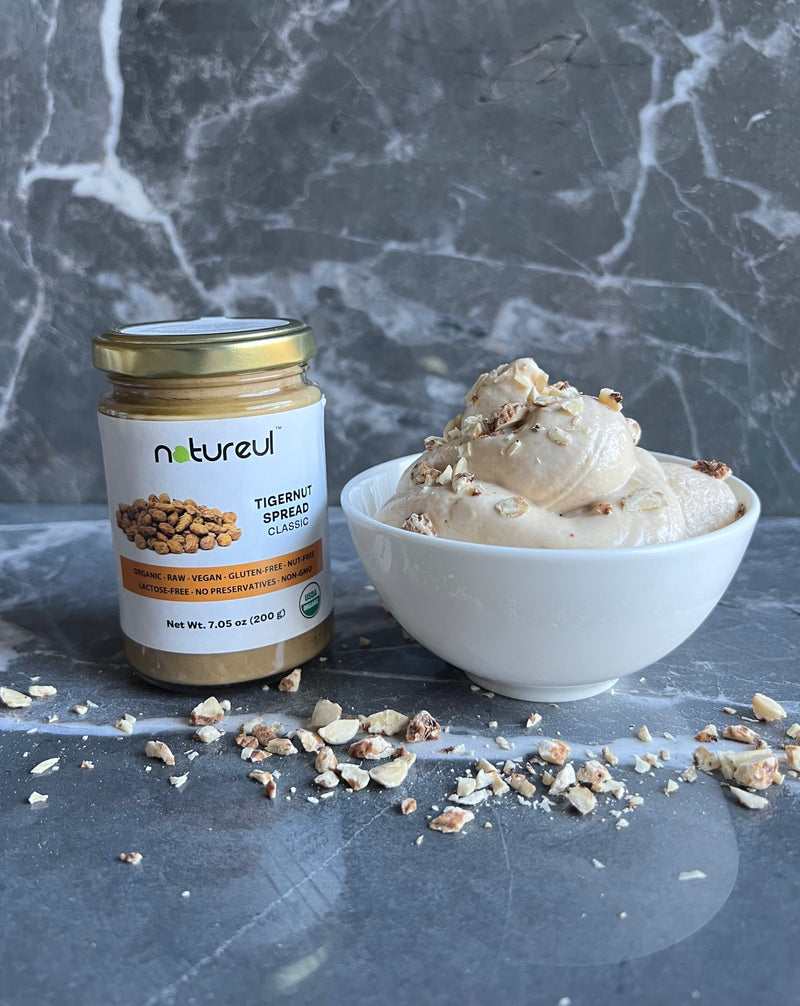
Get your froyo fix at home with this easy, simple, vegan version of cafe-style froyo, featuring none other than our Original tigernut spread with no added sugar and no common allergens. Made dairy-free and using only natural ingredients, this creamy, healthier version of traditional frozen yogurt with tigernut flavor is the perfect midday treat or evening indulgence.

Ingredients

  • 1 ½ cups non-dairy yogurt, plain and unsweetened
  • ¼ cup Natureul Tigernut Spread
  • 2-3 tablespoons sweetener (we used maple syrup)
  • 1 teaspoon vanilla extract
  • Pinch of salt
  • 2-4 tablespoons of non-dairy milk or water

Instructions

  1. Add the yogurt to an ice tray and freeze for at least two hours or overnight.
  2. Add the frozen non-dairy yogurt, spread, sweetener, vanilla extract, and salt to a blender. Pulse to break up the cubes. Once the frozen yogurt has broken down enough to be blended, blend on high for 10-15 seconds, adding liquid one tablespoon at a time until it’s reached your desired consistency.
  3. To create the cafe-style effect, pour the frozen tigernut frozen yogurt into a piping bag or zip-top plastic bag and freeze for ten to fifteen minutes.
  4. If using a piping bag, cut off the tip of the bag and add to another piping bag with the piping tip of your choice inserted. If using a plastic bag, simply snip a hole in one corner and hold the bag at an angle.
  5. Twist the top of the bag closed and squeeze the frozen yogurt out into a bowl from the back of the bag with your dominant hand in a swirling motion, guiding with your non-dominant hand. Make sure to work inwards toward the center to create the signature froyo swirl.
  6. Top with your favorite frozen yogurt toppings or eat plain! Bon appetite!

Tips For Making Cafe-style Tigernut Froyo

Get creative with the piping shape. If you use a smooth, round piping tip, you’ll get a perfectly soft swirl. If you want to mimic soft-serve machines, use a star tip with 6-8 peaks, that will make creases in the swirls like froyo shops often have. You can also use a petal tip to make frilly, fluffy stacks of soft tigernut yogurt.

Add a tigernut-chocolate magic shell. Looking for a chocolatey upgrade? Combine a little melted chocolate with a few tablespoons of tigernut butter and coconut oil. Pour it over the top of the froyo and watch the magic happen!

For a bit of extra interest and a crispy crunch, serve the froyo in a cone or a waffle bowl. Whether you make the cone yourself or use store-bought, any edible ice cream container will work and will be sure to delight your diners!

How to Store Cafe-style Tigernut Froyo

This tigernut frozen yogurt is meant to be enjoyed immediately, but you can freeze it in an ice cube tray overnight and then transfer the cubes to a Ziploc. Blend the cubes again according to the original instructions to resurrect the soft creaminess of the froyo.

Read more →

How to make Thai-Style Tigernut Green Beans Side Dish (Easy Recipe)

SEPRA USA LLC

The perfect summer side dish has arrived: Thai-style green beans with crunchy toasted chopped tigernuts. Crisp and tender green beans, a savory sauce, and tons of garlicky goodness await in every bite, offering a flavor explosion in exchange for very little effort. 

This recipe comes together in less than 20 minutes – only ten of which are spent in active cooking. Where recipes usually call for peanut butter, we use allergy-friendly tigernut spread instead, adding an allergy-friendly twist with simple, organic ingredients, no added sugar, and a similar nutty taste.

Ingredients

  • 1 pound fresh French green beans
  • 2 tablespoons olive oil
  • 1 small head of garlic
  • 2 tablespoons soy sauce or coconut aminos
  • 2 tablespoons Natureul Tigernut Spread in Original Flavor
  • 1 inch fresh ginger, peeled and minced
  • ¼ cup roasted tigernuts, roughly chopped
  • Optional: ½ - 1 teaspoon red chili flakes

Instructions

  1. Wash and trim the end of the green beans. Peel, crush, and roughly chop the garlic into medium-sized chunks.
  2. Add the green beans, garlic, and oil to a bowl. Toss to coat.
  3. Warm up a skillet over medium heat. Add the chopped tigernuts and toast for 2 minutes, then remove from the pan and set aside.
  4. Reduce the heat to medium-low and add the green bean mixture.
  5. Allow the green beans and garlic to cook until fragrant, approximately 5-7 minutes, tossing with tongs or stirring with a wooden spoon periodically to prevent burning.
  6. Add the ginger, tigernut spread, soy sauce, and optional chili flakes.
  7. Allow the mixture to cook for 2-3 more minutes, tossing occasionally to coat the green beans in the sauce.
  8. Just before removing the green beans from the skillet, add the chopped toasted tigernuts and toss to distribute evenly.
  9. Serve as a side with your favorite Thai entree!

Tips For Making Thai-Style Tigernut Green Beans

Buy pre-cut green beans. If you’re looking for a shortcut, the best one you can make is to buy pre-cut green beans. This will save you tons of time on hand-trimming both ends of every single green bean and allow you to get straight to cooking much faster! 

If you need a substitute for the crushed and chopped garlic, you can use a diced shallot or jarred minced garlic instead, whether you’re short on time or low on pantry ingredients. 

Don’t use canned or pickled green beans. It may be tempting to grab a convenient can from your stores to use in this recipe, but the crispness of fresh green beans is what makes the tigernut green beans stand out.

How to Store Thai-Style Tigernut Green Beans

You can store these Thai-style tigernut green beans in an airtight container in the refrigerator for up to five days. If you need to store them longer, transfer them to a Ziploc or other freezer-safe container and freeze for up to 3 months. Thaw them in the fridge overnight and reheat on the stovetop for best results.

Read more →

How to make Single-serving Tigernut Peach Crumble with GF Oat Topping (Easy Recipe)

SEPRA USA LLC

If you’ve got a severe sweet tooth but not enough energy to bake a pie, this single-serving tigernut peach crumble with a gluten-free oat topping is the answer to your prayers. Made in less than 20 minutes (plus cooling time) and containing less than 10 ingredients, it’s easy, breezy, and delicious. 

The secret is the combination of juicy peach and our creamy, buttery, nutty tigernut spread. Our organic, non-GMO, non-dairy tigernut spread with no added sugar is the perfect pairing to fresh fruit and a crispy topping. Plus, they’re allergy-friendly because they don’t contain any actual nuts! This tigernut peach crumble is a no-brainer when it comes to choosing a quick homemade dessert for one – just chop the peaches, toss all the filling ingredients together and bake, then pop on the crispy topping for a few more minutes in the oven.

Ingredients

  • 1 large yellow peach or 3 small white peaches
  • 3 tablespoons brown sugar, plus more for topping
  • 3 tablespoons Natureul Tigernut Spread
  • ½ teaspoon vanilla extract
  • ½ teaspoon cinnamon
  • 1 teaspoon coconut oil or other neutral oil
  • Pinch of salt
  • 2 tablespoons certified gluten-free oats

Instructions

  1. Preheat the oven to 350℉.
  2. Slice the peach (or peaches, depending on your preference of yellow or white peaches) in half, remove the stone, and then dice into ½ inch pieces. You can peel the peaches or leave the skin on, depending on your tastes.
  3. Add the peaches, coconut oil, tigernut spread, vanilla extract, cinnamon, salt, and 3 tablespoons of brown sugar to a small ramekin or oven-safe coffee mug. Stir to combine.
  4. Bake in the preheated oven for 10 minutes.
  5. Carefully remove the ramekin from the oven with an oven mit. Top with the oats and the remaining brown sugar.
  6. Place the ramekin back in the oven for 5 minutes.
  7. Remove the peach crumble from the oven and allow it to cool for 5-10 minutes before enjoying!

Tips For Making Tigernut Peach Crumble

Prep the peaches ahead of time. You can cut down on labor in the moment and make the peach crumble more convenient by using frozen peach chunks or by cutting and storing the peaches yourself before you’re ready to make the full crumble!

Not a fan of peaches? Swap them with apricots, mangoes, apples, bananas, pears or other soft fruit. They should get tender and juicy in the crumble just like the peaches, and all of these fruits would taste delicious with the creamy, nutty taste of the tigernut spread!

How to Store Tigernut Peach Crumble

To store leftover tigernut peach crumble, scoop the cooled leftovers out of the ramekin and into an airtight container. Store it in the refrigerator for up to 3 days, or transfer it to a freezer-safe container and freeze for up to a month. Allow it to thaw in the refrigerator overnight before reheating or eating again.

Read more →

How to make Roasted Butternut Squash with Tigernut-Honey Glaze (Easy Recipe)

SEPRA USA LLC

Summer is just around the corner, and with it comes a (hopefully) bountiful garden harvest. This roasted butternut squash with a tigernut-honey glaze is perfectly sweet, tender, and creamy thanks to the addition of our original Tigernut Spread. The earthy, nutty flavor of the tigernut spread perfectly complements the butternut squash’s natural sweetness and adds a more complex taste and texture to a simple vegetable. Made without artificial ingredients, processed sugar, or common allergens, our Tigernut Spread is the perfect addition to this simple side dish.

Ingredients

  • 1 small butternut squash
  • 2-3 tablespoons olive oil
  • 3 tablespoons honey
  • 3 tablespoons Natureul Tigernut Spread in Original flavor
  • ¼ teaspoon fine salt
  • Pepper to taste

Instructions

  1. Preheat the oven to 350℉.
  2. Using a vegetable peeler, remove the hard outer skin of the squash. Carefully slice the squash in half lengthwise, then use a spoon to scoop out the seeds. Cut the squash into 1 - 1 ½ inch cubes.
  3. Add the squash to a bowl with the olive oil, salt, and pepper. Toss to coat.
  4. Spread the squash in a single layer on a lined baking sheet and place in the oven. Bake the squash for 12-15 minutes until fork-tender and crisp on the edges.
  5. In a small bowl, stir together the honey and tigernut spread until combined. Carefully pour over the squash and then bake again for another 5-7 minutes until the glaze thickens.
  6. Remove the baked tigernut-honey glazed squash from the oven and allow to cool before plating.

Tips For Making Roasted Butternut Squash with Tigernut-Honey Glaze

Choose a smaller squash. It may be tempting to go for the most massive specimen at the supermarket, but a smaller butternut squash is easier to work with. If you need to make a large amount, use several small squashes.

To make the squash easier to work with, chop it where the bulb meets the neck before slicing the parts lengthwise. Do this after peeling the whole squash to make the process easier on yourself.

Use local honey. Honey that’s local to you is good for your environment and great for your immune system! Honey from different farms will taste different according to the plants they pollinate, so try different varieties to see what works best for you.

Make it sweeter. If you like your butternut squash sweeter, add a few more tablespoons of honey to brighten things up. Add a squeeze of lemon for an even bigger burst of flavor!

How to Store Roasted Butternut Squash with Tigernut-Honey Glaze

You can store the roasted butternut squash in the refrigerator in an airtight container for up to 7 days. Freezing it is simple, too: just make sure your container is freezer-safe and freeze the squash for up to 6 months. If you want it to be easy to cook from frozen, freeze it in a single layer on a lined baking sheet until solid, then transfer it to a Ziploc or other sealed bag. Reheat on a baking sheet following the original instructions.

Read more →

How to make Hot Tigernut Pita Pocket with Spicy Chicken and Chickpeas (Easy Recipe)

SEPRA USA LLC

A quick, healthy flavorful lunch with a bit of a kick, this hot tigernut pita pocket with spicy chicken and chickpeas is the perfect 15-minute meal. With protein, fiber, and healthy fat, it’s sure to keep you full all day long. As an added bonus, our tigernut spread infuses a complex, earthy and nutty flavor without any actual nuts or artificial ingredients. It’s an all-around win.

Ingredients

  • 1 pita pocket or sandwich thin
  • 3 tablespoons Natureul Tigernut Spread
  • 4 ounces cooked chicken, chopped or shredded
  • ¼ cup chickpeas
  • Handful lettuce or mixed greens
  • 1 teaspoon sriracha
  • ½ teaspoon smoked paprika
  • Salt and pepper to taste

Instructions

  1. In a skillet over medium heat, re-warm the chicken for 3-4 minutes, stirring in ½ the sriracha and smoked paprika to coat the chicken. Add salt and pepper to taste. Remove from the pan and set aside.
  2. Add the chickpeas with the remaining sriracha and smoked paprika to the hot skillet. Toss to coat and heat for 5-8 minutes until the chickpeas are cooked through and start to crisp on the edges. Continue cooking until the chickpeas reach your desired crispness, stirring occasionally to prevent burning.
  3. Cut a pita pocket in half and open the cut sides to reveal the hollow inside.
  4. Spread a thick layer of tigernut spread on the inside of both halves of the pita pocket.
  5. Carefully stuff the pita pocket halves, layering the mixed greens, cooked chicken, and chickpeas.
  6. Move an oven rack to the top third of the oven and turn on the broiler.
  7. Place the pita halves on an oven-safe dish and pop them under the broiler for 3-5 minutes until the whole sandwich is warm and the top is toasted, keeping an eye on it so it doesn’t burn.
  8. Remove the pita from the oven and allow it to cool for a few minutes before digging in.

Tips For Making Hot Tigernut Pita Pocket with Spicy Chicken and Chickpeas

Turn it into a wrap or sandwich instead. Change up the shape of the meal: add the usual ingredients to a large, burrito-size tortilla or sandwich bread and heat it up using the same instructions.

Make it vegan. This tasty tigernut pita can be made vegan or vegetarian with one simple swap: just switch out the cooked chicken with tofu or tempeh instead! Cook it according to the same instructions, spicing it up the exact same way for a tasty sandwich with a kick.

How to Store Hot Tigernut Pita Pocket with Spicy Chicken and Chickpeas

To save this tigernut pita pocket with spicy chicken and chickpeas, wrap it tightly in plastic wrap or place it in a sealed container and refrigerate it for up to two days. Reheat in the oven at 350℉ for 10-15 minutes until heated through, then allow to cool as normal and enjoy! The pita may be soggy after a day or two, so the sooner, the better.

Read more →

How to make Caramelized Banana Tigernut Breakfast Sushi (Easy Recipe)

SEPRA USA LLC

Looking for a speedy, tasty, simple but exciting breakfast? Mix up your usual morning routine of cereal and waffles by tossing in these caramelized banana tigernut “sushi” pieces – made of just 5 ingredients and finger food-friendly, they’re the ideal breakfast or mobile snack.

And, thanks to Natureul’s wholesomely-formulated tigernut spread, it’s a healthy option with no added processed sugars, no GMOs, and an allergy-friendly alternative to traditional nut butters. Grab a jar and get to rolling these tasty tigernut banana sushi bites right away!

Ingredients

  • 1 medium-large ripe banana
  • Natureul Tigernut Spread, Original Flavor
  • 1 large flour tortilla (we used seedy multigrain tortillas)
  • 2 teaspoons Coconut oil
  • Honey or agave nectar for drizzling

Instructions

  1. Spread the tigernut spread on one side of the tortilla. Make sure to evenly coat all the way to the edges of the tortilla, as this will act as the glue that seals the edges and holds the “sushi” together.
  2. Place the banana on top of the spread towards one side of the tortilla. If you have a curvy banana, straighten it out a bit to ensure it rolls evenly. It may break in a few places, that’s okay.
  3. Roll the banana tightly in the tortilla. Seal the tortilla together on the edges.
  4. Using a sharp knife, carefully slice the wrapped banana into rounds, making them about an inch to an inch and a half thick. Use a gentle sawing motion to prevent ripping the tortilla.
  5. Heat a skillet over medium-low heat. Add coconut oil and allow it to heat up before adding the banana rounds.
  6. Once the oil has had time to heat up, add the wrapped banana slices, cut side-down so the banana is touching the pan. Fry for 2-3 minutes until golden brown, then flip and fry for another 2-3 minutes to achieve the same effect on the other side.
  7. Use a spatula to remove the banana sushi slices from the pan and turn off the heat.
  8. Serve and eat as-is, or drizzle with honey or agave nectar. Eat with chopsticks for the full sushi experience or use your fingers for easy cleanup!

Tips For Making Caramelized Banana Tigernut Breakfast Sushi

Use very ripe bananas. Bananas should be ripe enough to be pliable but not squishy enough to fall apart. Riper bananas will have more natural sugar content and caramelize faster and more evenly, whereas more unripe bananas will be starchier and not caramelize as easily.

Use a flexible tortilla. This recipe relies on rolling the tortilla tightly, so the more soft and flexible the tortilla, the better.

Skip the skillet. Running low on time or just prefer raw bananas to cooked? Because the ingredients are ready-to-eat and safe raw, you can skip the cooking steps and eat it cold.

Get ahead. Meal prep a few breakfasts ahead of time by preparing several wrapped and sliced bananas in advance, then reheat, eat cold, or take them on the go for a convenient breakfast or snack.

How to Store Caramelized Banana Tigernut Breakfast Sushi

If you can’t finish all of the banana tigernut breakfast sushi or want to prep it ahead for later, you can place the cooled pieces in an airtight container and refrigerate for up to five days or freeze for up to two weeks.

Read more →

How to make Gooey Chocolate Chip Tigernut Cookie Bars (Easy Recipe)

SEPRA USA LLC

These Gooey Chocolate Chip Tigernut Cookie Bars are almost like a brownie and a cookie had a baby–but it’s not quite a blondie or a brookie, thanks to the use of better-for-you ingredients, the resulting cookie bars are deliciously soft and gooey in the center and don’t set completely firm like a regular cookie or brownie might.

Natureul’s Tigernut Spread is the one ingredient that sets this decadent dessert apart from the rest. It adds a sweet and mildly nutty flavor, despite being completely nut free with no added sugars! The spread keeps the cookie bars moist and soft in the center, but lets the top crust over and turn golden like a typical cookie. Our Tigernut Spread changes the game with simple, wholesome, organic ingredients.

Prep time: 10 minutes

Bake time: 20-25 minutes

Total time: 30 minutes

Makes 9-12 square cookie bars

Ingredients

  • 1 cup all-purpose flour of choice (gluten free flour, tigernut flour, or almond flour will work)
  • 1 egg (or flax egg), room temperature
  • ½ teaspoon salt
  • ¾ cup sweetener of choice (sugar, erythritol, maple syrup, stevia, or monkfruit can be used)
  • ¾ cup Natureul Tigernut Spread in the flavor of your choice
  • ¼ cup milk or plant-based milk alternative
  • ½ teaspoon vanilla extract or vanilla bean paste
  • ½ cup dark chocolate chips

Instructions

  1. Preheat your oven to 350℉ and line an 8 x 8 pan with parchment paper. Set aside.
  2. Combine the flour, sweetener, and salt in a medium-sized bowl.
  3. Whisk together the egg, milk, and tigernut spread in a separate bowl until completely combined.
  4. Fold the wet ingredients into the dry ingredients until just combined. Add the dark chocolate chips and fold them in gently until they are evenly distributed.
  5. Transfer the batter to the parchment-lined baking pan and use a rubber spatula to spread it gently and evenly all the way to the edges.
  6. Bake for 20-25 minutes or until the edges are golden brown and a toothpick inserted into the center comes out clean but slightly oily.
  7. Allow to cool completely before removing from the pan and slicing into squares. Enjoy!

How to Store These Gooey Chocolate Chip Tigernut Cookie Bars

You can store these tigernut cookie bars in an airtight container at room temperature or in the refrigerator for up to 5 days. Refrigeration is necessary if you used dairy milk instead of a non-dairy milk in this recipe. You can freeze them in a freezer-safe container for up to 6 months.

Tips for Making the Best Gooey Chocolate Chip Tigernut Cookie Bars

Don’t skip the cool time. Because these bars are so deliciously soft and gooey, you should wait until they have cooled and set before slicing into them or risk making a mess.

If you want a sweet cold treat, you can turn them into ice cream sandwiches! Just freeze the cookie bars on a lined baking sheet after you cut them. Once they’re frozen solid, spread some slightly-thawed ice cream of your choice on the bottom of a bar and sandwich with another bar. Wrap each par tightly in parchment paper, freeze again, and enjoy!

Read more →

How to make Crunchy Homemade Tigernut Cereal Bites (Easy Recipe)

SEPRA USA LLC

You’ll never want to shop the cereal aisle again once you’ve tried these Crunchy Homemade Tigernut Cereal Bites. They’re everything you want in a homemade cereal: sweet (but not too sweet!), crispy, and soft. The best part is that you can eat it warm and fresh from the oven. 

These cereal bites are healthier than traditional store-bought cereal because you can control exactly what goes into them. This recipe only calls for 6 ingredients that can be prepped and in the oven in just ten minutes, thanks to the key ingredient, Natureul Tigernut Spread.

Better than peanut butter or other nut butters, this spread is actually nut free and naturally gluten free. It’s also made from organic tigernuts and natural spices and oils, so you can rest easy knowing that you’re choosing the best of the best for your baking. 

Prep time: 10 minutes

Bake time: 15 minutes

Total time: 25 minutes

Serves 1-2

Ingredients

  • ½ cup Natureul Tigernut Spread in the flavor of your choice
  • 1 cup gluten free or regular flour
  • 1 teaspoon baking soda
  • 1 teaspoon salt
  • ¼ cup neutral oil (coconut or avocado work best!), melted
  • 1 teaspoon vanilla extract
  • Optional: cinnamon and nutmeg

Instructions

  1. Prehead the oven to 350℉ and line a baking sheet with parchment paper.
  2. In a medium bowl, combine the flour, salt, baking soda, and any additional spices if you’re opting for those.
  3. In a separate bowl, combine the oil, vanilla extract, and the tigernut spread and stir until completely combined.
  4. Add the wet ingredients to the dry ingredients and stir until combined.
  5. Using ½ teaspoon scoops, roll the mixture into small balls. They don’t have to be the exact same, just similar. Place them on the lined baking sheet.
  6. Bake in the oven for 12-15 minutes, until the balls have firmed up and started to brown around the edges. They should be much drier than the original mixture.
  7. Allow them to cool completely, then scoop into a bowl or divide between two bowls and top with your milk of choice! Enjoy!

How to Store Crunchy Homemade Tigernut Cereal Bites

Store unused tigernut cereal bites at room temperature in a Ziploc bag or other airtight container for up to 5 days. Freeze in a freezer-safe container for up to 6 months.

Tips for Making Crunchy Homemade Tigernut Cereal Bites

Think outside the cereal box. These tigernut cereal bites are great as breakfast cereal, but they’re also the perfect on-the-go snack or easy, allergy-friendly appetizer for small gatherings. Just store them sans-milk!

If you want to drizzle more tigernut spread over the top of the cereal bowl, it will add more contrasting texture and extra tigernut flavor. Add it by the spoonful for total tigernut overload.

Customize your cereal. Add mix-ins like dried fruit or chia seeds to your bowl, dunk or drizzle the cereal bites with chocolate, or roll them in cinnamon sugar for a tailored cereal experience.

Stuff them with chocolate. Doesn’t chocolate make everything better? Turn these tigernut bites into tigernut chocolate bombs by rolling the mixture around a chocolate chip or two!

Read more →

How to make Chicken Meatballs with Zingy Tigernut Sauce (Easy Recipe)

SEPRA USA LLC

Dinner tonight is sorted, and it’s one you’ll want to make on repeat for the foreseeable future: Chicken Meatballs with Zingy Tigernut Sauce. These Asian-inspired meatballs are packed with herbs and aromatics–think ginger, garlic, green onion and cilantro–and paired with an equally tasty tigernut-based sauce that will wow your taste buds and have you going back for seconds.

This quick meal comes together in a few short steps, and it’s made in one pan (plus a side dish for the sauce). These amazing meatballs get a boost from the sweet and spicy tigernut sauce, made with Natureul’s organic, non-GMO, gluten free Tigernut Spread.

Prep time: 10 minutes

Cook time: 25 minutes

Total time:  35 minutes

Serves 2-4

Ingredients

  • 1 pound lean ground chicken or turkey
  • 1 egg (or flax egg)
  • ½ cup gluten free breadcrumbs or flour
  • 1/4 cup finely chopped green onion
  • ¼ cup finely diced cilantro
  • 3 cloves garlic, minced or grated
  • 1 tablespoon freshly grated ginger
  • salt and pepper to taste
  • 2 tablespoons avocado oil, coconut oil, or olive oil
  • ½ cup coconut milk
  • ½ cup Natureul Tigernut Spread in Original flavor
  • 1-2 tablespoons sriracha, chili oil, or gochujang
  • 1/2 teaspoon sesame oil
  • 2-3 tablespoons soy sauce or coconut aminos

Instructions

  1. Preheat the oven to 350℉.
  2. In a large bowl, combine the ground chicken or turkey, egg, breadcrumbs or flour, green onion, cilantro, garlic, ginger, salt and pepper.
  3. Using clean hands, roll the mixture into 2-3 ounce balls, about the size of a golf ball.
  4. Preheat a large skillet over medium-high heat. Once the skillet is hot, add the oil and allow it to heat up for 2-3 minutes before adding the meatballs and arranging them so that none of them are touching.
  5. Sear the chicken meatballs for 1-2 minutes on each side until brown. Once all sides have been browned, pop the skillet into the oven for 10 minutes until the meatballs are cooked through.
  6. While the meatballs are in the oven, make the sauce. In a small bowl or blender cup, combine the sesame oil, soy sauce, sriracha, coconut milk, and tigernut spread. Stir or blend to combine completely. Taste and adjust ratios as necessary.
  7. Once the meatballs are done, allow them to cool for five minutes before drizzling with the zingy tigernut sauce and serving!

How to Store Chicken Meatballs with Zingy Tigernut Sauce

Store leftover meatballs separately from the sauce in an airtight container for up to two days. If you can’t use them all in two days, freeze them instead! Place baked meatballs in an airtight container or Ziploc bag and freeze for up to 3 months. You can also freeze the sauce in a freezer-safe container for the same amount of time.

Tips for Making Chicken Meatballs with Zingy Tigernut Sauce

These chicken meatballs with tigernut sauce are great for lunch or dinner. Serve with rice or quinoa, steamed or roasted veggies, and sliced avocado for a well-rounded, complete meal.

Add your favorite garnishes. Pickled carrots or onions, kimchi, and more green onion are great topping choices. You can also add chopped tigernuts for an allergy-friendly crunch.

Make ahead of time for an easy, nutritious meal! Make a big batch of these chicken meatballs and tigernut sauce and freeze for a quick meal (or many meals) during a busy season.

Read more →

How to make No-bake Tigernut Energy Balls (Easy Recipe)

SEPRA USA LLC

Satisfy your sweet tooth in a healthy way with these no-bake tigernut energy balls. This recipe requires only five ingredients and less than ten minutes of work–perfect for meal prepping to get ahead for the week! They also don’t require any cooking whatsoever. A quick chill in the fridge is all that stands between you and these easy, delicious, chocolatey snack balls.

The key ingredient that binds everything together into these perfect snack-sized morsels. You can use either the Original Tigernut Spread or Aromatic Carob Tigernut Spread, depending on your preferences, but no matter which you choose, you’re getting all-natural USDA organic ingredients with no gluten, dairy, or artificial ingredients. Plus, it’s safe for those with nut allergies!

Prep time: 10 minutes

Chill time: 1 hour

Total time: 1 hour 10 minutes

Serves 4-6

Ingredients

  • 2/3 cup Natureul Tigernut Spread, flavor of your choice
  • ¼-½ cup dairy-free chocolate chips or chunks, dark or semisweet or an equal measure of dried raisins or cranberries
  • 1 cup gluten free rolled oats
  • 2-3 tablespoons honey or maple syrup
  • 2-3 tablespoons optional mix-ins (see below for details!)

Instructions

  1. In a medium or large bowl, combine the Tigernut Spread and honey or maple syrup by stirring until the sweetener has been distributed evenly.
  2. Add the rolled oats and stir until combined.
  3. Fold in the chocolate chips and mix-ins.
  4. Using a large spoon or a mini cookie scoop, portion the mixture into balls. They should be 2-3 tablespoons each. Roll them into balls with your hands and place them on a lined cookie sheet or plate.
  5. Refrigerate until firm, about 1 hour.
  6. Transfer to a storage container and grab one whenever you need a quick tasty snack!

How to Store No-bake Tigernut Energy Balls

Once the energy balls have been chilled and become firm, transfer them to an airtight container and store in the refrigerator for up to seven days. You can also freeze them in a freezer-friendly container or Ziploc bag for up to 3 months.

Tips for Making No-bake Tigernut Energy Balls

Make these no-bake tigernut energy balls your own by customizing the mix-ins. Add chia seeds, sprinkles, coconut flakes, crumbled tigernut granola, ground tigernuts, hemp seeds, flax seeds, poppy seeds–you name it. If it’s small and crumbly, it will likely work.

Swap the honey or maple for granulated sugar or a sugar alternative, if necessary. Coconut sugar, beet sugar, Swerve, stevia, and monk fruit are all great options, but the type of sweetener you choose will have an impact on the taste of the final product.

If you’re having trouble stirring the mixture, pop it in the microwave (transfer it to a microwave-safe container first!) for 5-10 minutes. Then, try to stir it again. If it’s still difficult, repeat the microwaving and stirring process until you’re able to combine the ingredients completely.

If the mixture isn’t sticking together, add more honey or chill the mixture in the refrigerator until it firms up before trying to form balls.

Read more →